Two easy to build microcontroller projects. First publication of page, 2016-03-20 Although not an active CW operator, I enjoylistening to the lower end of the HF bands from time to time. Recently I wanted to demonstrate Morse code,and in particular how to use a Morse Key (who uses those anymore? J). To do this, I rigged up anArduino Uno with an LCD, hooked it up to the Morse Key and tested a few Arduinosketches for Morse Decode: 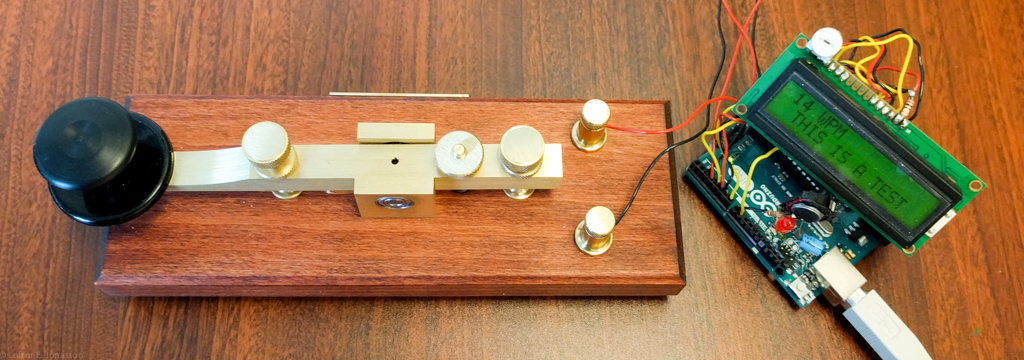 It was a disaster – it turns out that mostMorse code decoding software relies on the transmission being very accuratelytimed and with little or no jitter. - Definitely not me when pumping away using a hand Key. Some Googling around turned up a documentwith the title:
available here: http://www.dtic.mil/dtic/tr/fulltext/u2/786492.pdf Mildly put, I am not adept at reading thePDP-12 instruction set. However thisproject is very well documented with diagrams, flowcharts and equations – so itwas not hard to reproduce the methodology using an Arduino Uno as a platform. The big surprise though, was the realization howvery capable the Arduino is in relation to a 1970’s style minicomputer. 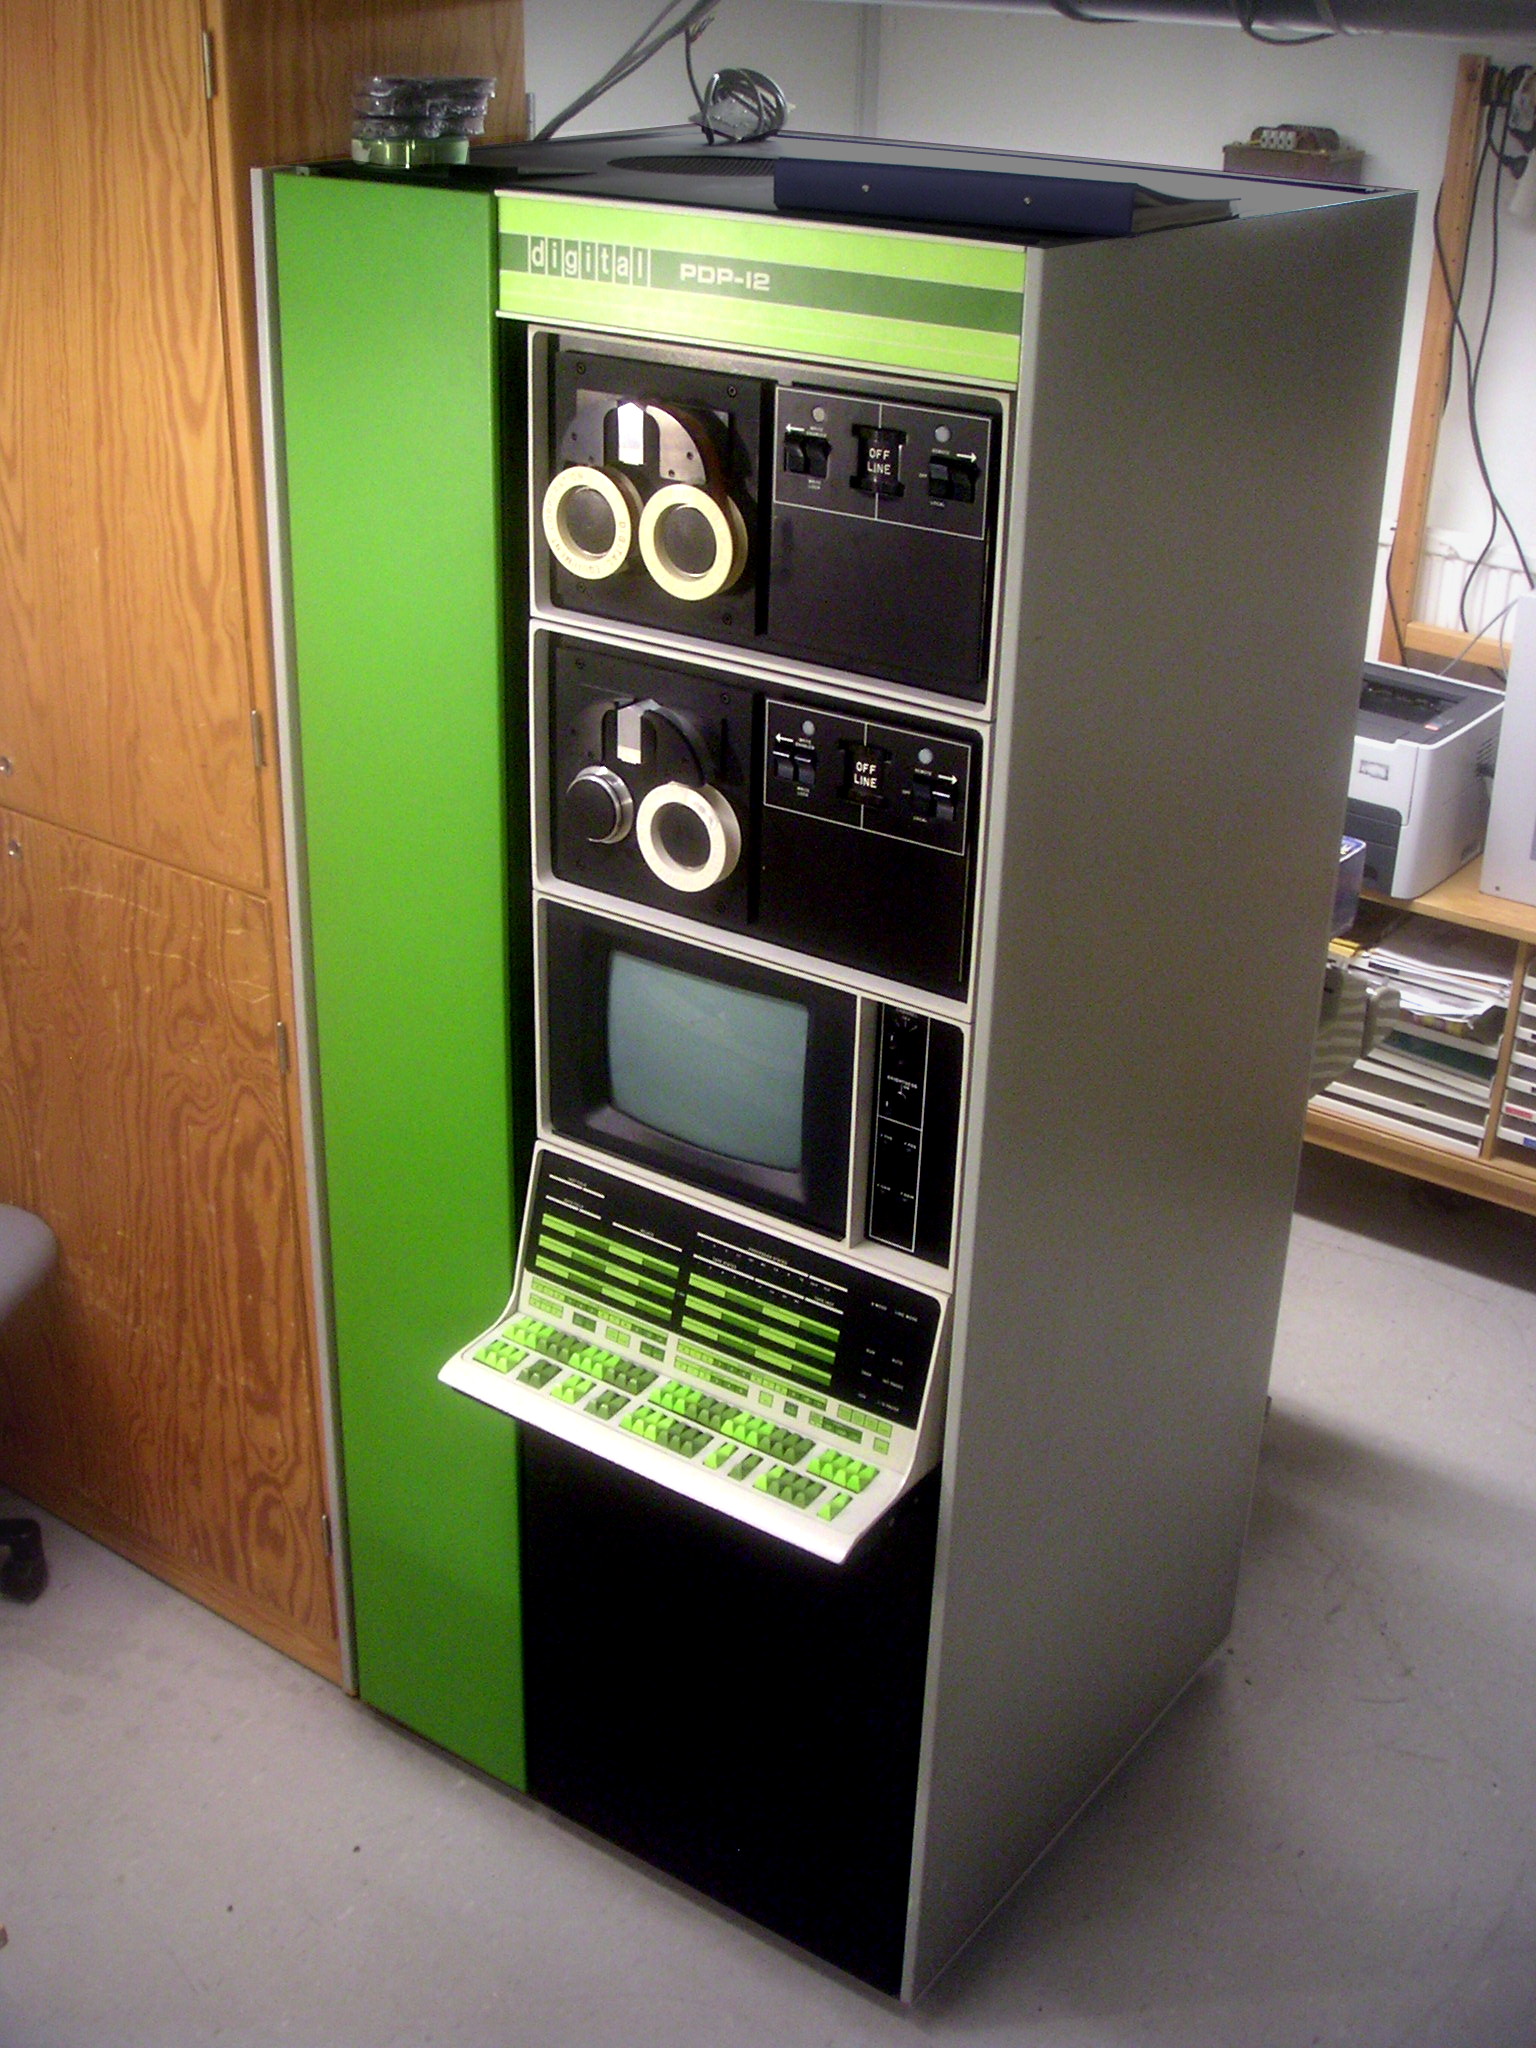 The two Morse Decode projects side by side. Disclaimer: The size of picture below is not to scale with the size of the picture above J 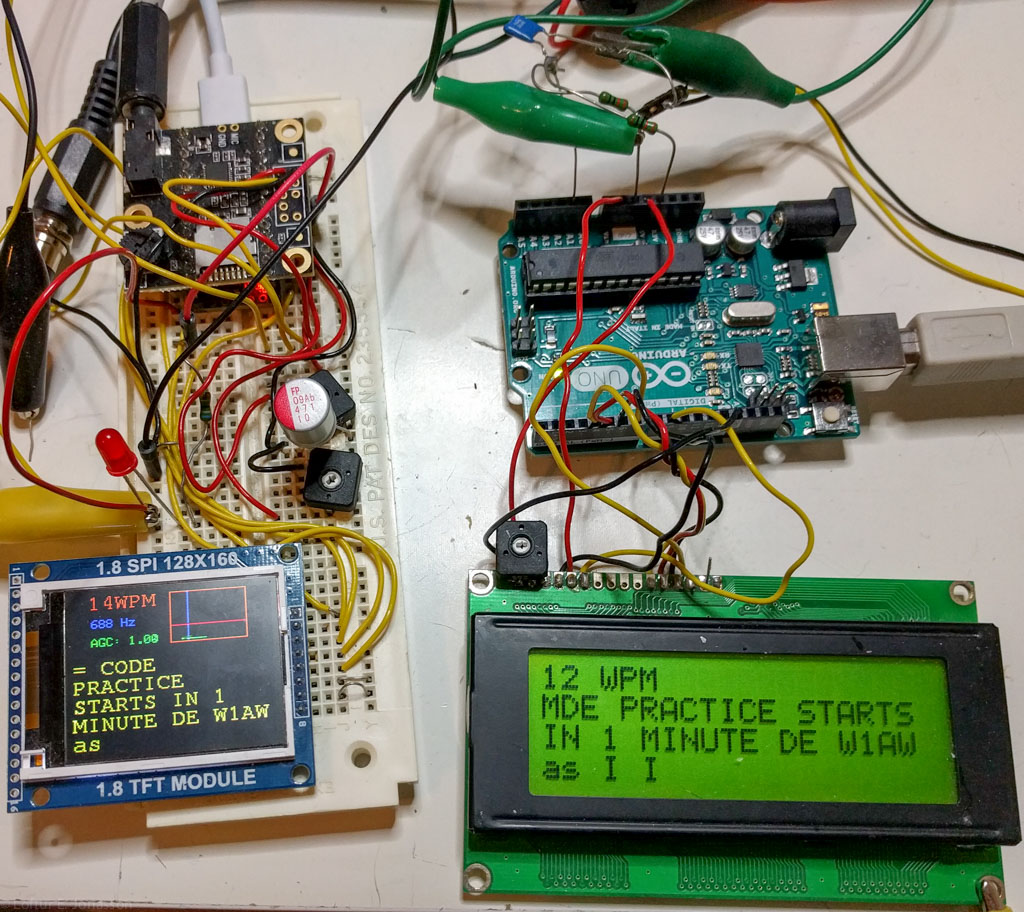 Take One, an Arduino Uno sketchTo make a long story short: All the algorithms described in Mr. Guenther's paper wereimplemented, including a 200 microsecond interrupt function for signalsampling, error correction algorithms and other good stuff – and with some improvementsof my own here and there. Worksbeautifully, the only snag being that it takes the reception of up to 20characters to accurately sample the timing pattern. But nothing is lost while doing so;everything is buffered until ready to decode. The Arduino sketch at the bottom of thiswebpage, while written for an Arduino Uno, should work with just about anyArduino derivative – together with a HD44780 compatible 16x2 or 20x4 LCD. In addition to printing the decoded data to theLCD, the sketch also sends the data to the (USB) serial port. Two inputs are provided – one digitalinput, to directly connect a Morse Key or similar – and another analog input,for direct audio hookup to the speaker output of the Radio. The analog input relies on a lightweightbut impressive Audio Tone Processing method by the name of “Goertzel Algorithm”. In fact, the Goertzel code I use is a directswipe from another Arduino Morse Decode sketch written by Hjalmar SkovholmHansen OZ1JHM (http://skovholm.com/cwdecoder). Hjalmar, thanks for making your code publiclyavailable.
Connections diagram, Arduino version: 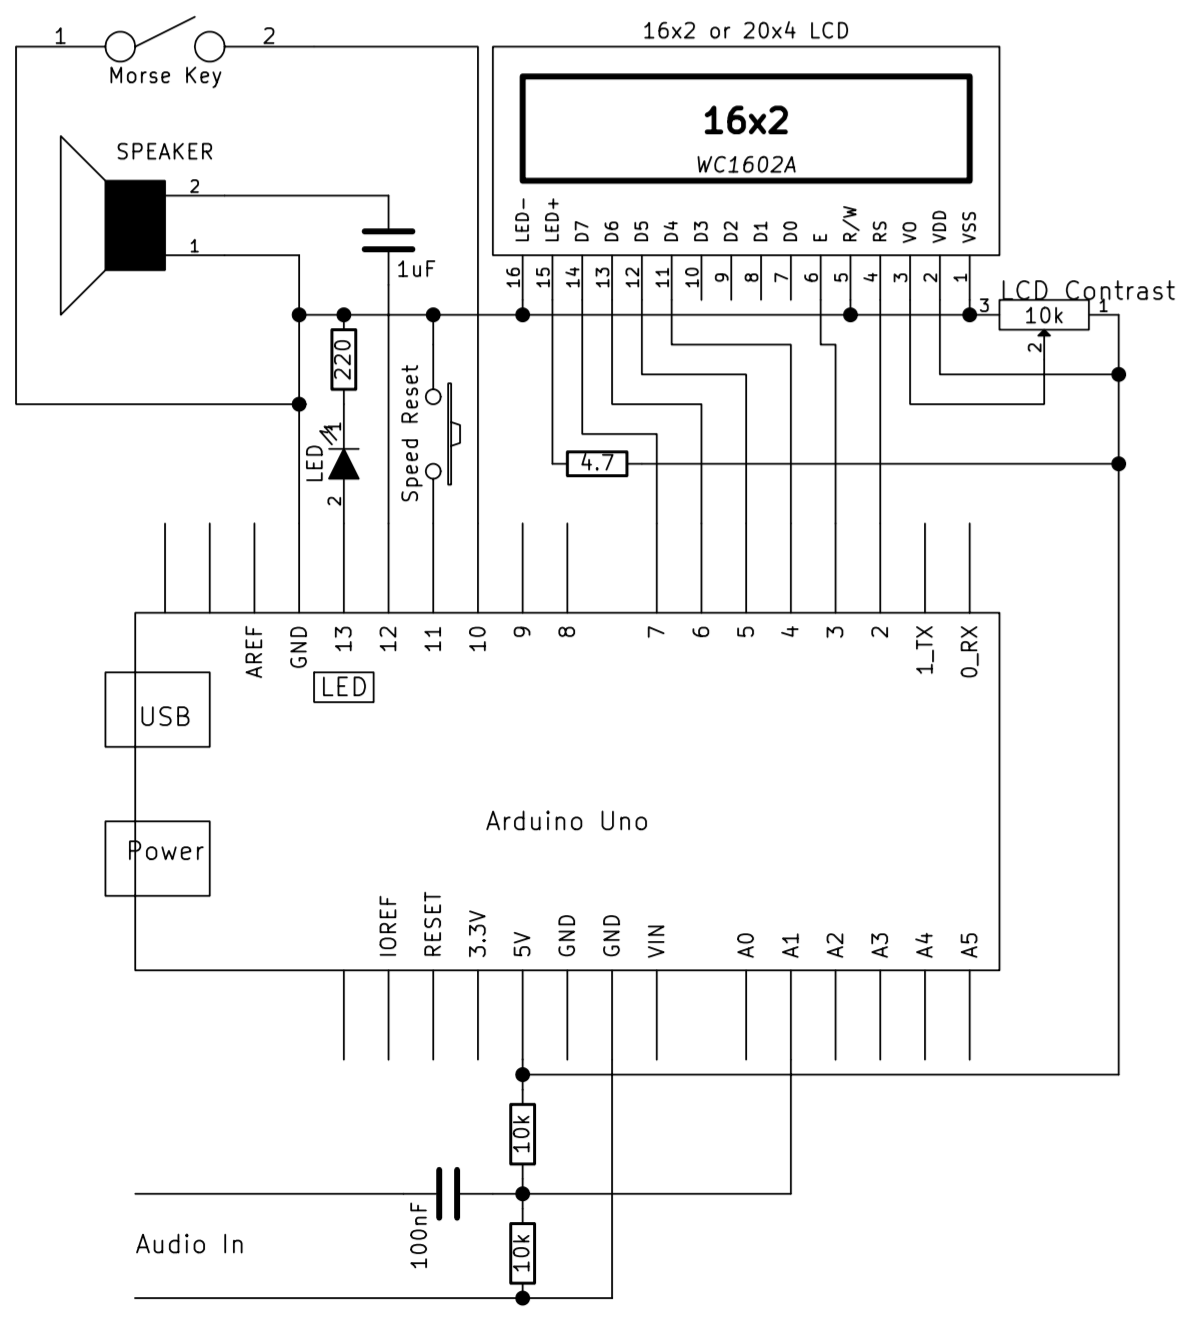 The speed-reset toggle switch is not really necessary. The morse keyinput and the audio input are equivalent, if one input is not in use– then it doesn’t bother the other one. The speaker output is not necessary, but givesa useful indication when adjusting the receive tone and signal level from thereceiver. If you want to use a 20x4Display, then modify the relevant #defines in CWReceiveArduino.h. Take two, Fast Fourier Transform and Colour GraphicsThe Teensy 3.2 Sketch at the bottom of thiswebpage, is a further elaboration on the above theme. It uses a standard Adafruit (ST7735) 160x128pixel TFT LCD and the Teensy Audio Shield. FFT1024 or FFT256 is used to filter thetone and then some additional noise cancel methods can be used to further cleanup the signal before passing it to the decodefunctions. The received signal is visualized using aWaterfall-type display. Using the visualqueues, one can adjust the volume, signal level threshold and peak tonefrequency of the desired signal – using three trimpot resistors. Connections diagram, Teensy 3.2 and AudioShield version: 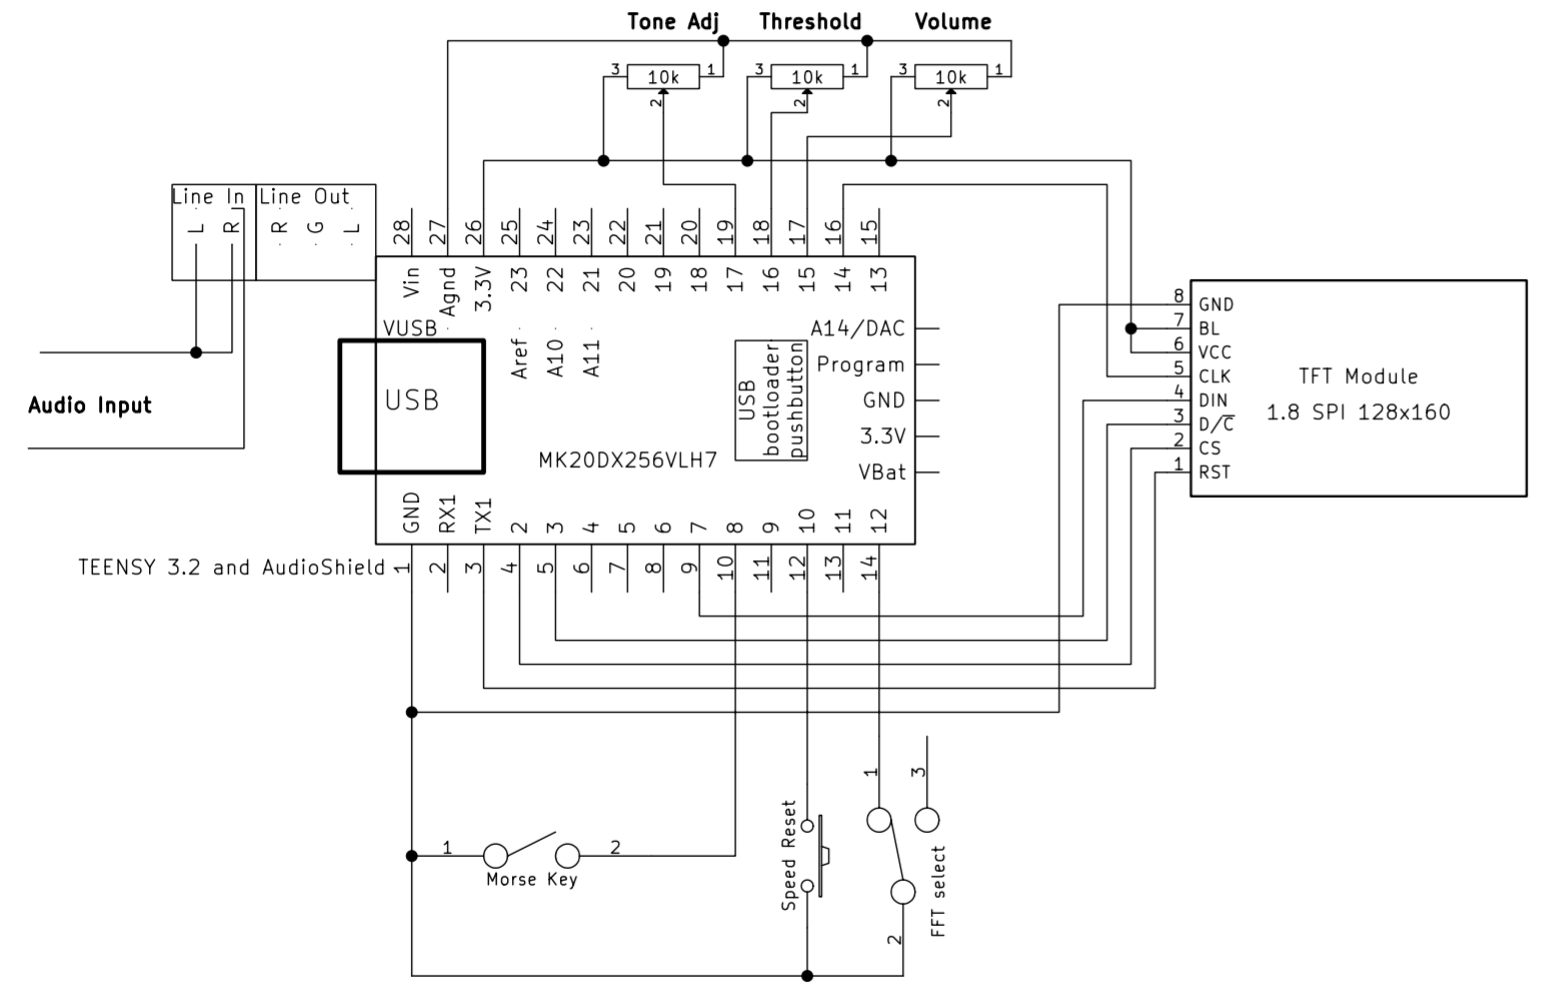 The 3.5mm audio output connector on theAudio Shield, not shown on the schematic, reproduces the filtered CW signal, usefulfor adjusting optimal reception. Like the first sketch, this one also printsthe decoded Morse Code to both LCD and (USB) serial port. The time it takes for a Fast FourierTransform to make new measurements available is directly related to the lengthof the FFT (number of points). An audiostream sampled at 44.1 kHz (Teensy Audio Shield) by a 1024 FFT, willprovide 512 bins of signal strength measurements – each of them 43 Hz wide (these are also used to draw the Waterfall display), 86times per second, or once every 11.6 milliseconds. This limits the timing rate at which theMorse code transmission can be measured accurately. If the rate of the Morse code transmission is20 words per minute, then this is roughly equivalent to 5 time ticks per “dit”. It turns out that 20WPM is slightly below theobserved highest readable speed without noticeable amount of errors, when usinga 1024 FFT. To be able to decode at higher speeds, a256 FFT can also be selected – running at four times the speed of the 1024 FFT,the penalty being much worse frequency resolution of desired vs. undesiredsignals, so much stronger “desired” signals are required. The 256 FFT should work beyond 40WPM,depending on which post-filters (defined in the CWReceive.h file) are selected. Enough said. Both sketches contain a number offiles. Unpack the zip files, but makesure not to rename the folders - theArduino GUI won’t like that. The Arduino sketch needs the standardArduino GUI, available at http://Arduino.cc. If not installed by default, then theTimerOne library needs to be installed (sketch -> include library -> managelibraries, type “timerone” in search window). To compile the Teensy sketch, in additionto the Ardino GUI you will also need to install Teensyduino, available here: http://www.pjrc.com/teensy/teensyduino.html When installing Teensyduino, you will beoffered the option of selecting certain Libraries for install. Select all. When opening the sketches, the second tabin the Arduino GUI is a .h file with a number of user customizable#define’s. Have fun. 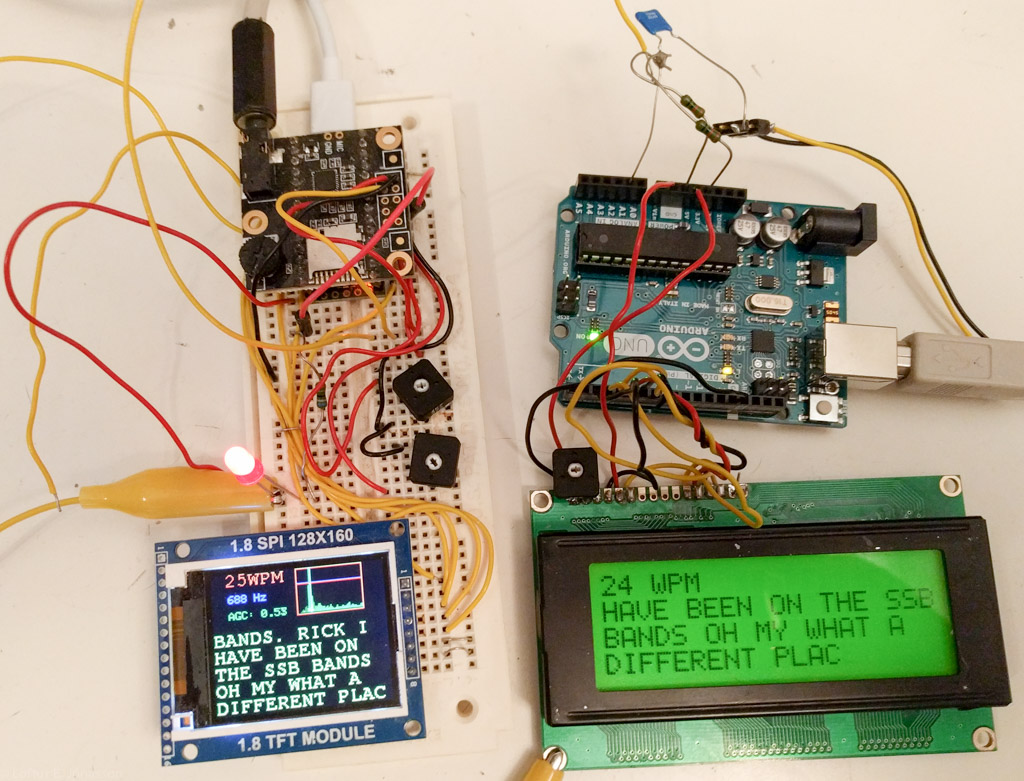 To download any of the files below, please click on the down arrow ďat the right hand side of the file. |